I love seeing Weddings and Showers that incorporate unique yet simple ideas for centerpieces and favors. There is something about an imaginative handmade piece that can make your event even more memorable. I’ve noticed lately that painted cans and jars are growing in popularity. Perhaps it’s the waste not, want not mentality. Or, the need to be more cost-effective when having a Wedding. There are so many great ideas out there. I think these Painted Tin Can Centerpieces add that unexpected touch that will make your guests smile. I’m still smiling every day as I see these sitting on my window sill.
……………………………………………………………………………………………………………………………….
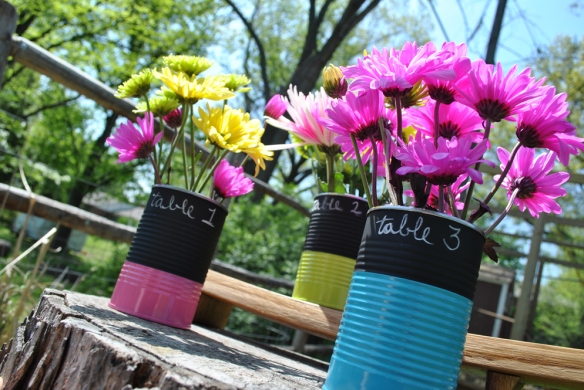
PAINTED TIN CAN CENTERPIECES
- Gather up those used tin cans
- Wash and dry cans thoroughly
- Tape off the top edge of the can with painters tape.
- Prime your tin cans with a Self Etching Primer. This helps the paint to stick to the can better. (I used Rust-Oleum)
- Once the primer is dry, then spray with Chalkboard Paint. You can find this at any home improvement store. Set aside and let dry for at least a couple of hours.
- Select your favorite colors of paint or colors that coordinate with your special event.

- Now, tape off each can where you want the color to show. Do this by covering the area that you DON’T want painted with tape. This will protect the chalkboard paint from being covered by the colored spray paint. I chose to tape them at different heights on each can. Paint with multiple light coats or you’ll get runs in the paint. Having different sized color blocks adds more interest and variety. But, use your imagination and paint these however you like. You can paint stripes, multiple colors, your initials or anything you can think of. It’s your event, make it unique to you!
- Let the paint dry overnight. Once the paint no longer feels like it is tacky it is fully dry.
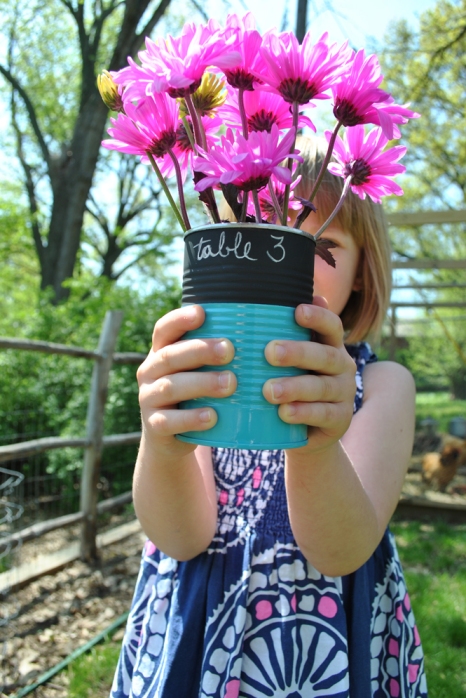
- Take chalk and label each can with your table numbers, guests names or whatever you like.
- Fill with beautiful flowers, utensils, candy, or straws. There are so many great ideas you can use these painted cans for.
There you go, sweet and simple! Plus, once your Reception or Shower is over these can still be used again. There are countless ways you can continue to use these Painted Tin Cans. What do you think? How would you use these centerpieces? Or, how would you alter them to work for you? Till next time…